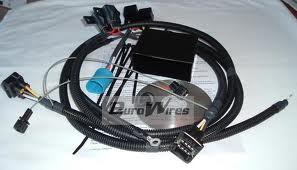
The following instructions were written and photographed using a G60 Corrado that had a 1.8T conversion. This fact should have little impact on the installation of this wiring harness. The VR6 car should be similar as far as how to run the harness and mount the relays. Some of the photos are of an A2 Golf in areas where the two cars are nearly identical.
Use your good judgment in the actual routing of the wires to avoid sharp edges and hot surfaces. Support the wires by tying them to other bundles or braces with zip ties.
Read through the entire procedure before beginning so that you will better understand what you are being asked to do. Please note the important wiring modification shown in Figure #15. Corrado owners will need to perform this step.
Please observe all normal safety precautions when working near gasoline and electrical systems.
Installation will take about 1.5 hours if you take the time to do other tasks such as clean the battery posts and tray, etc.
You should begin by removing the grill and headlights. Make a vertical pencil mark on the fender to show how far forward the battery comes to, then remove the battery. This harness is based on the relays being located on the inner fender behind the left headlight.
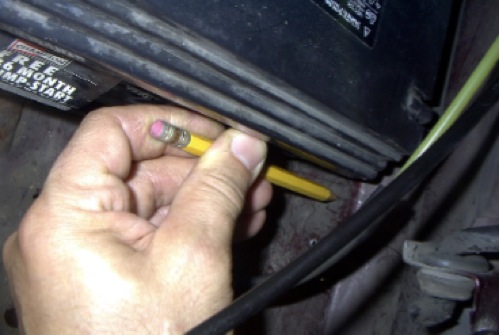
Figure 1: Marking battery forward position
The kit comes with a plastic box to cover the relays. The box has holes drilled in the back side. Place a piece of masking tape along your pencil mark and on the front side of it. Hold the box along the front edge of the tape, such that the tape would act as a spacer between it and the battery.
The opening should face down with the holes against the fender, and there should be approximately 30-40 mm of space between the box and the frame below it. Stretch the box open and mark thru these holes with a pencil. You only need two of the holes now, the third hole is for a possible third relay for fog lights. Your view of this will be upside down as you mark the holes.
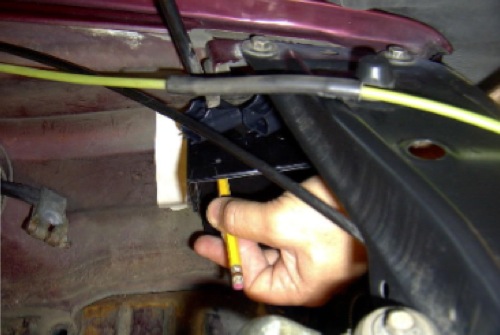
Figure 2: Marking new relay box position
Use a punch to mark the center of the two holes nearest to the battery. You will be drilling at an angle, so make a definite dent with the punch so the drill won’t wander. Drill two 1/8" (3mm) holes. Use care as the outer fender is not far behind the metal you are drilling. You must be prepared to stop the drill bit as it goes through to prevent denting the outer fender. Use one of the included screws to thread the holes.
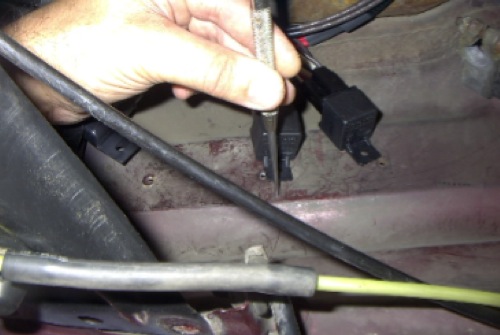
Figure 3: Punching position for drill holes
Mount the relays by putting the screws through the relay tabs first and then through the box and into the holes. Hold the relays vertical while you tighten the bolts snugly, but not too tight. The view here is upside down like you would see while working.
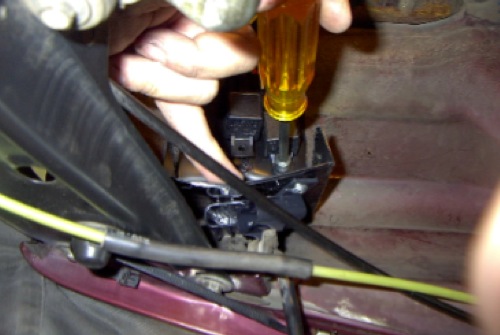
Figure 4: Screwing new relay box to inner fender
Now wrap a long zip tie around the lower part of the box to hold it closed. This pic is of an earlier version where the fuse holders were attached to the box.
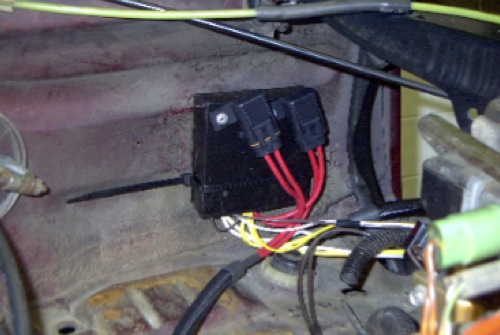
Figure 5: Zip tie new relay box
Now it’s time for the wiring. First you need to run the brown ground wires to a good grounding point. Route the two brown wires around the battery to the bolt where the negative battery cable attaches to the frame. Clean or wire brush the grounding surface and the bottom of the bolt and washer for a good contact.
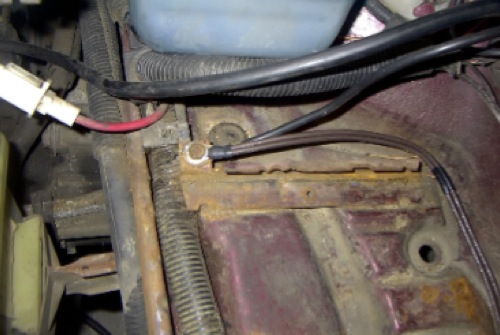
Figure 6: Running new ground wire to chassis
Next you should run the red power lead to the lug on the starter. Just follow the brace on the fan shroud and zip tie the cable to the brace. With the battery disconnected, remove the 13mm nut on the starter connection and attach the power lead there with the battery cable.
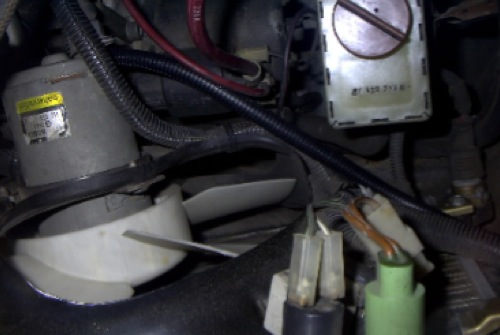
Figure 7: Running new power wire to starter lug
Now take the long cable for the right headlight and pull it out between the left headlight and the radiator into the area behind the grill. This cable will be represented in these pics by a piece of black coaxial cable.
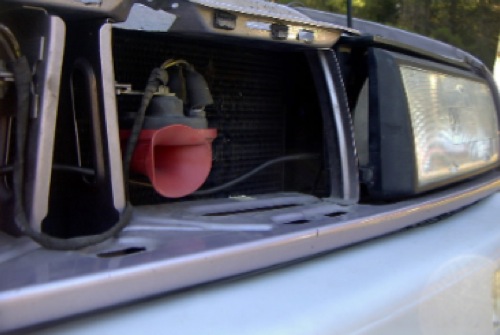
Figure 8: Right headlight cable behind grille
The right headlight plug is not attached to the harness. It may be in place and not fully snapped on, or the wires may have a shrink covering on them. This is so that you can feed the cable thru these passages in the radiator support. Carefully pull the right headlight plug off of the wires or cut the shrink wrap off. Notice the black coax in the picture, fed through the holes under the horns. This is to illustrate the path of the right side cable.
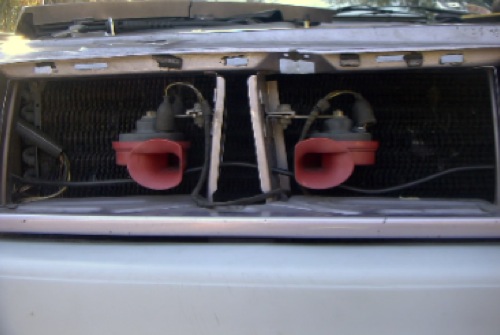
Figure 9: Right headlight cable routing demonstrated
Continue to feed the cable into the area behind the right headlight. Once you have completed the next step and are sure the cable will not have to be pulled back out, plug the wire terminals into the right headlight plug in the same arrangement as the left plug. I have marked the side of the plug with the wire colors. They have to be held in proper alignment before they will snap in. Be careful as the terminals are very difficult to remove from the plug.
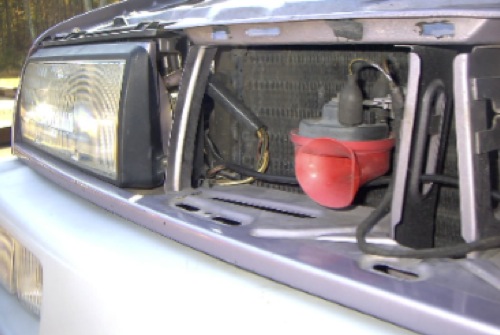
Figure 10: Feeding right headlight cable
If the area behind your right headlight is enclosed, find or cut a notch in the lower part of the box for wiring to feed through. Route the headlight plug to where it should be and push the loom down into the notch so that the cover can be put back on.
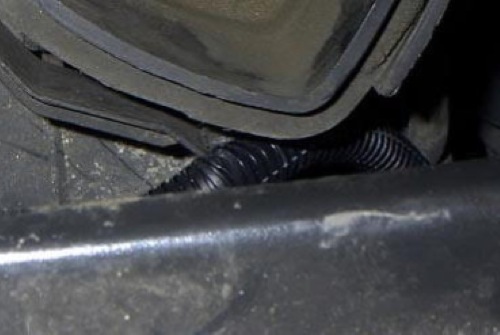
Figure 11: Notching right headlight box to feed wiring loom
Install the right headlight and attach the new harness plug. Shape the stiff wires to fit naturally without straining. There may be a cover boot made of heat shrink tubing in your kit to cover the original right side headlight plug. If so, put it on over the plug now.
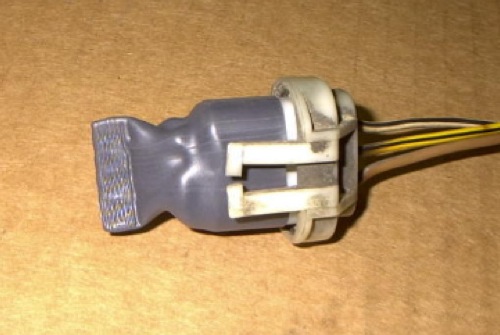
Figure 12: Covering the original headlight plug with supplied boot
Back on the left side, you will connect the harness input connector to your original headlight plug. Depending on availability, your harness may have either a blue plastic plug or a handmade plug crafted from heat shrink tubing.
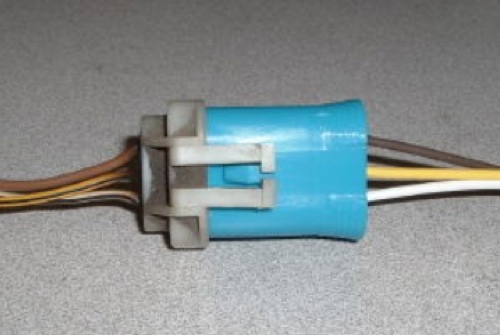
Figure 13: Connecting the new relay harness to original left headlight plug
Carefully plug the adapter into the left headlight plug so that the pins do not bend.
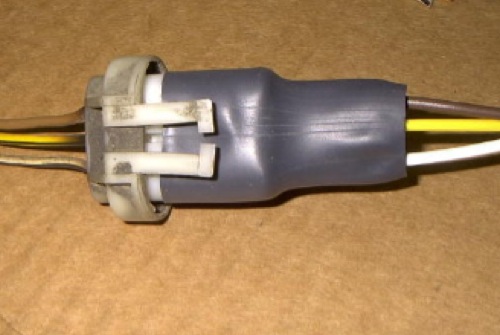
Figure 14: Connecting the new relay harness (alternate heat shrink version)
The wires for the left headlight should be in position for connecting, so shape them to line up with the connector. Now is a good time to neaten up the wires and tie them together out of the way.
If this is a harness for European headlights, connect the plugs on the gray wires to the empty parking light connectors that your stock parking lights were plugged into.
Install the left headlight and plug it in.
Owners of Corrados and B3 Passats usually find that their headlights will sometimes come on in the parking light position or fail to turn off after installing relays. This is due to the particular design of the headlight switches.
To avoid this, you must remove the headlight switch and relocate the white/ black stripe wire From position 56 to NSL as shown in the picture. Notice the red arrow going from the original position to the new position.
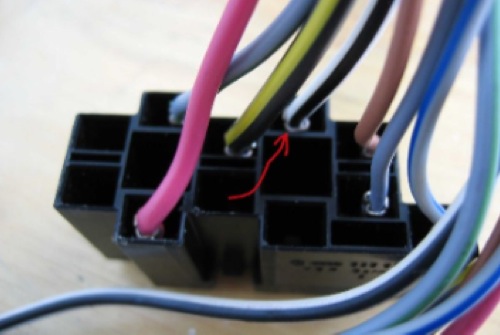
Figure 15: Relocating headlight switch wire to correct parking light position
Next, connect the battery and test the system. When turning on the low beam lights, you should hear the yellow-wired relay click and the low beams should come on. When you switch to high beams, the white-wired relay should click and the high beams come on.
If it works properly, you are finished. Reinstall the grill and anything else you removed. It is a good idea to replace your stock headlight fuses with the smallest ones available since the current has been removed from that wiring.


No comments have been posted yet...
Want to leave a comment or ask the owner a question?
Sign in or register a new account — it's free